Widget Style – How to customize your
Build A Bot
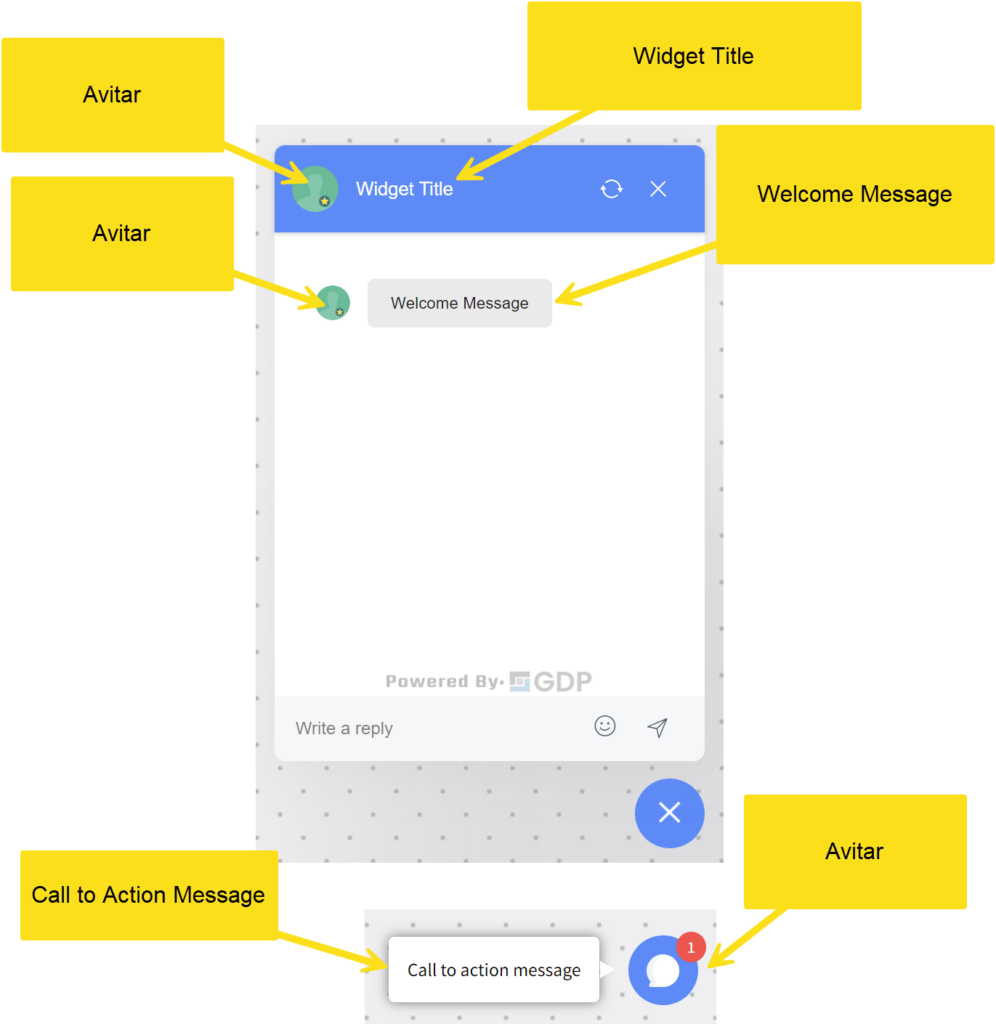
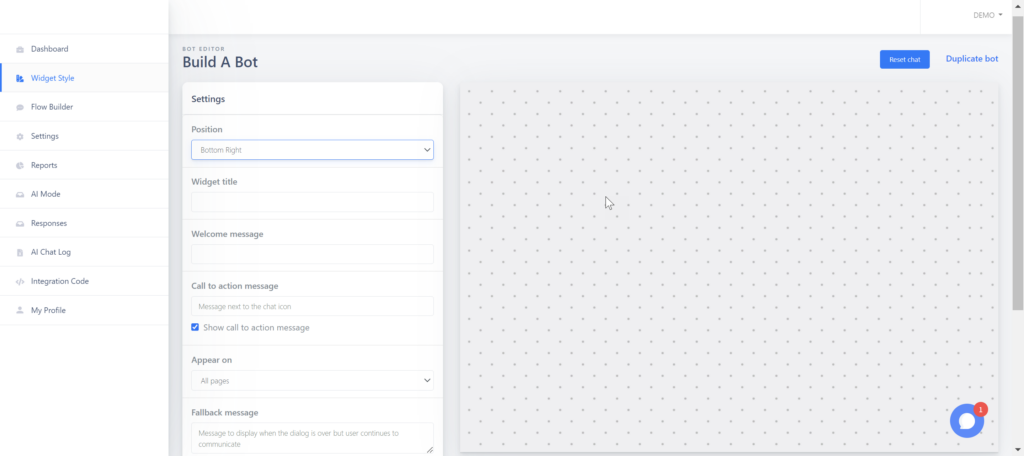
Settings – (See Figure1 Below)
-
Position
You have the option here to align your bot to the right which is standard for most bots you see today.
Optionally, you can left align your bot to make your site unique.
-
Widget Title
This is the Title located at the very top of the chat window and to the left of the Avitar.
-
Welcome Message
This is the message that appears as the 1st line in the chat window and is the greeting, and your 1st chance to entice someone to spark up a conversation.
-
Call to action
The most important text… This is the text that nudges the visitor of the site of its presence visually as well as carries an auditable notification that there is a chatbot there to spark up a conversation.
-
Appear on
Here you have one of two options:
1. The bot will appear on every page on the site where the integration code exists. If you’re using something like WordPress or something like Google Tag manager where you can centrally manage code across all of your site.
2. Specific Pages – if this option is chosen then you must enter text for “URL must contain“, and you can out in a list of comma separated words that must be found for the bot to show up on that page or site. -
Fallback message
This is the test show to the site visitor when the bot doesn’t know how to answer the question for your visitor.
-
Avatar
The image show to the user as shown in Figure 1 below
-
Theme or Custom Color
Choose from a set of 4 pre-configured colors or enter a hex color code minus the hash tag.

